
Cruising Log for S/V Freedom - a Gemini 105 - Jim and Deb Faughn
Paul Cook is building a Redwing 23
Paul Cook is a friend of ours, Jim and Deb on Freedom, and if you have read the sailing logs of s/v Freedom, you might remember Paul. We purchased our boat from Pat and Paul and they are great friends of ours. Paul has built several airplanes, remodeled and built houses, and is a great wood worker. So I guess I shouldn't have been surprised when he told me he was going to build a wooden boat. Their goal is to use the boat to explore the rivers, which are abundant in the midwest. I can see them now making the trip from Kentucky Lake up to Nashville, TN. Since he is building every part on the boat, wiring, plumbing and all the other things you have to do, I twisted his arm and he agreed to provide pictures so I could create this website for him showing his construction progress. He has sent me pictures and excerpts from his building log so you can follow along. However, building a boat isn't like building a house. It seems to take forever when you are also living life too so be patient and check back every month or so for an update. He is expecting to have it in the water around summer of 2009 at this point. |
|
| After the boat frames are built, they must be placed on a "strongback" to hold them in perfect alignment. And of course, you start upside down. | 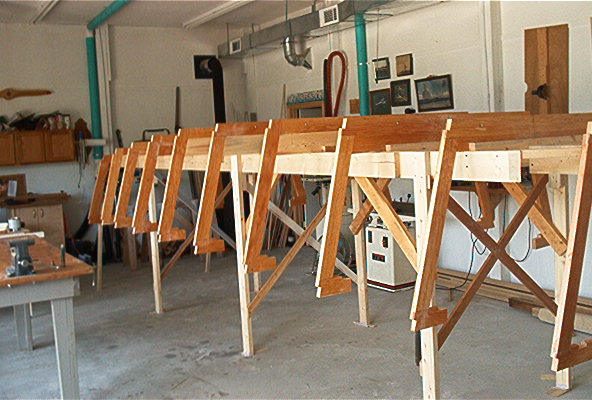 |
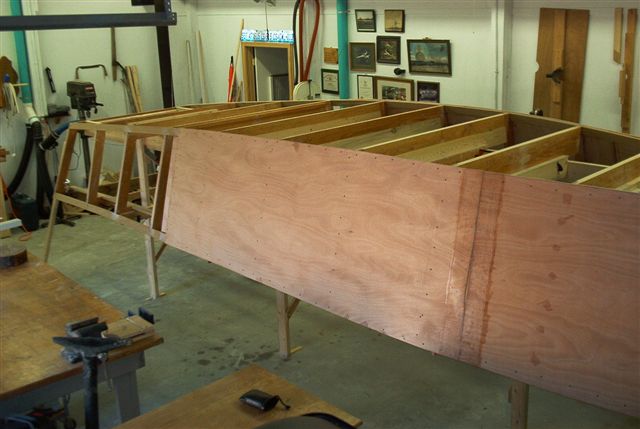 |
With frames in place, and carlines attached to frames, next add the Okome plywood with epoxy and screws. |
| While the boat is upside down, it is easier to make the cutout for the motor well before turning the boat. In fact, I completed everything possible to the hull when the hull was "up" | 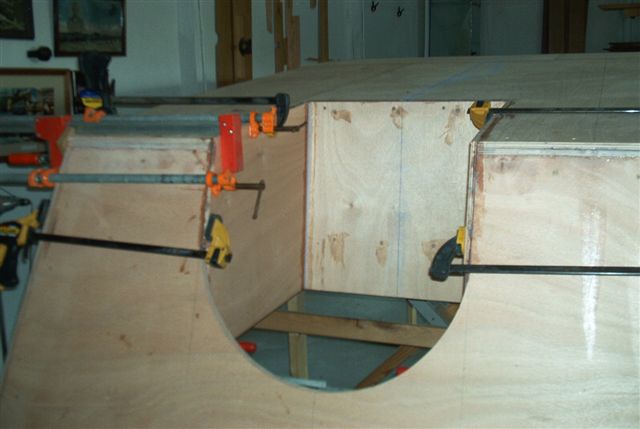 |
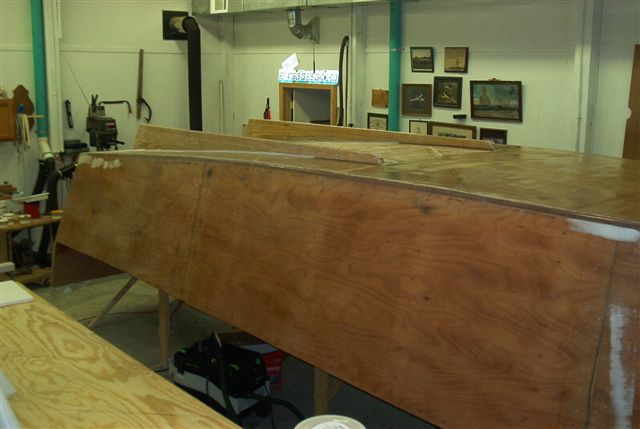 |
The hull is now fiberglassed with between 2 and 4 ply's of 6 oz glass, a few low spots filled, the weave in the glass filled with epoxy, and the twin scags bolted and fiberglassed into the hull. |
| The hull was next sanded and primered, made ready for painting. The waterline was marked and the anti-fouling paint applied. | 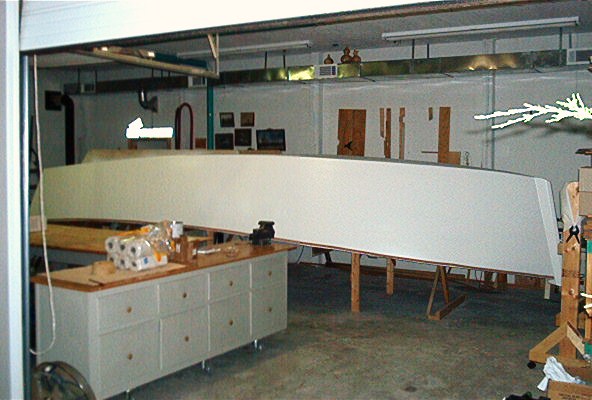 |
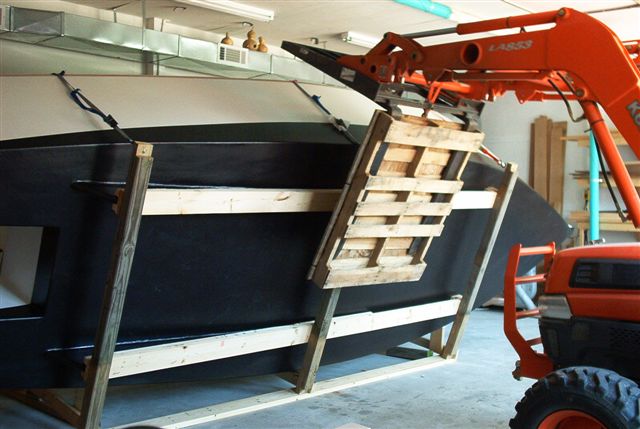 |
Turning the boat over is next. Fortunately, I had room for a tractor to help with the job. I build frame work on the boat so it could actually be rolled over, not lifted. The hull probably weighed around 1600 pounds at this stage. |
| And now you can see what the inside looks like without an interior. | 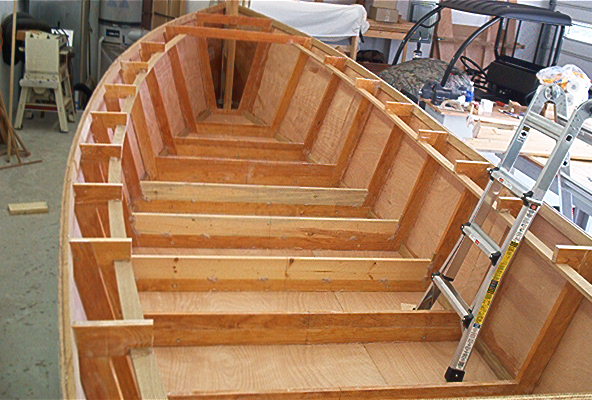 |
| You have to have clamps for this job too. | 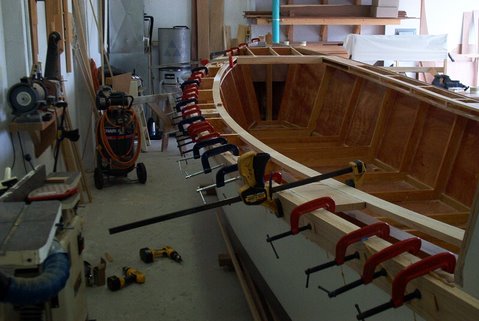 |
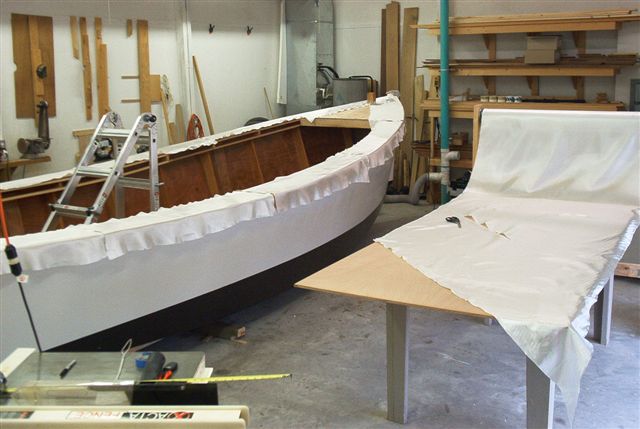 |
The boat seemed to have grown when it was turned over. The deck was added and fiberglassed. |
| Skipping ahead, the shearstrake was added where the hull and deck meet, and the forward cabin construction begin. | 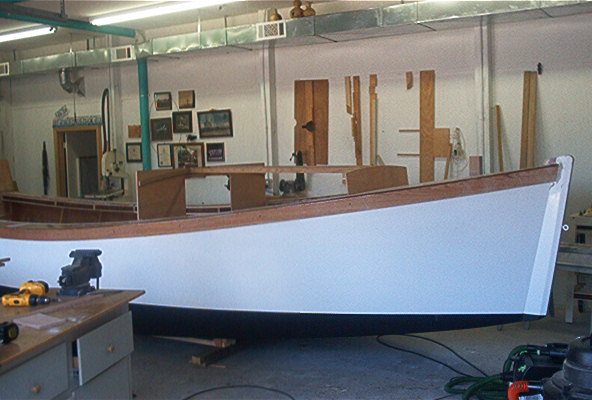 |
 |
Like I said previously, clamps are rally important. |
 |
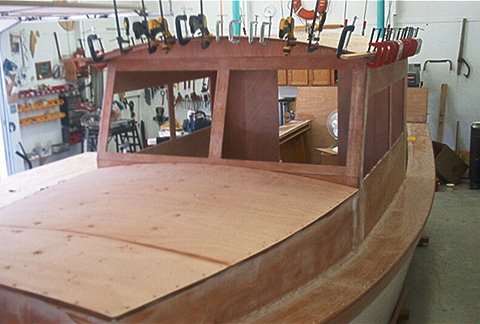
The pilot house added. |
| The top to the forward cabin and pilot house added, and a hatch roughed in. All outside surfaces are covered in with a minimum of two layers of fiberglass. | 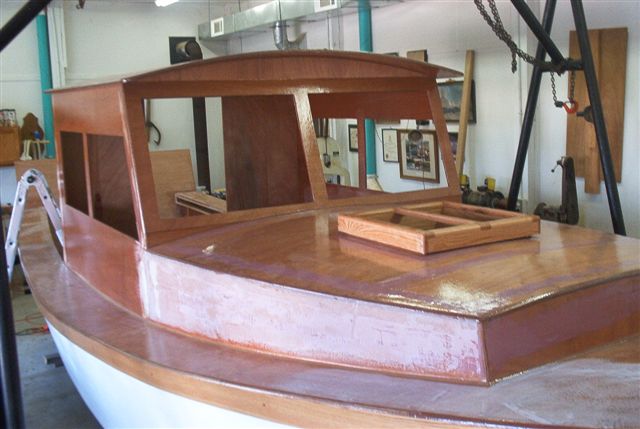 |
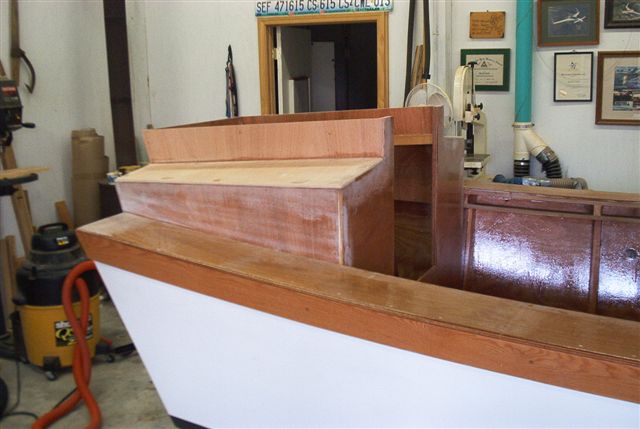 |
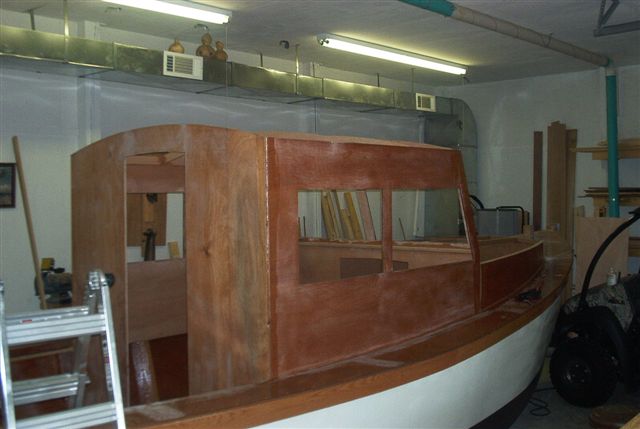
Building the engine compartment. |
Mar 25, 2008 - To the right you can see what it looks like just after completing the topside and finishing some varnishing of the window frames. |
 |
 |
When you are building a boat yourself, you have to understand systems. Like airplanes and houses, when it comes to installing the systems the plans typically say "install the instruments and equipment and wire the boat now." Really, almost everyone does it their way anyway so the designer is more concerned with structural integrity of the hull than the wiring. There is a 20 hp Honda on the back. In many ways building a boat is like setting up your own business. Yes you can copy other styles, for instance how most car rental businesses pattern their operations on shops, but the end product is entirely up to you. This summer Paul is going off to work as a boat captain at Yellowstone so it does look like it will be done next year. |
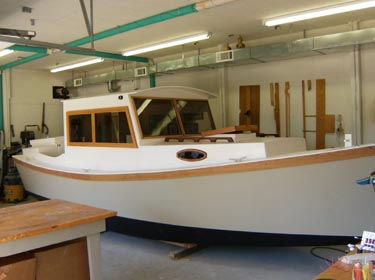
April 17, 2008 - Since the last update, I installed the windshield, side windows, and the hatch on the forward deck. Also you can see the hand rails forward along with the cleats and nav lights. I am using all led lighting since I don't want to carry a bunch of battery weight around. One of the really neat installations in this picture is the port hole. It was a pain to build but it sure looks good.
|
 |
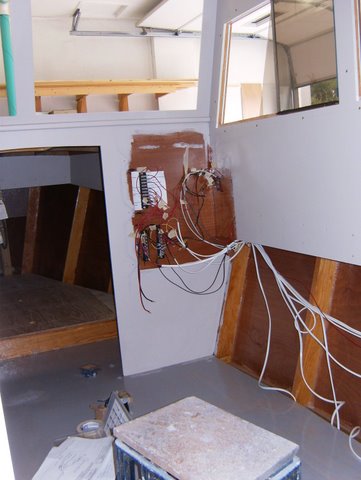
| May 4 - Everything but a GPS. The wire's await it where the tag is on the left | 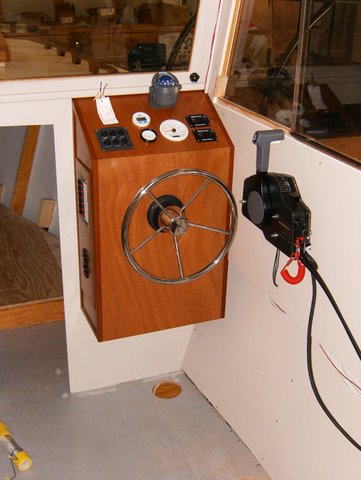 |
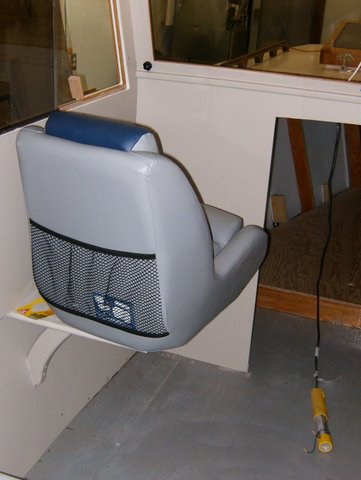 |
Pat's chair. No pedestal as need the room underneith for the Engle |
| Pilot house headliner w/o trim | 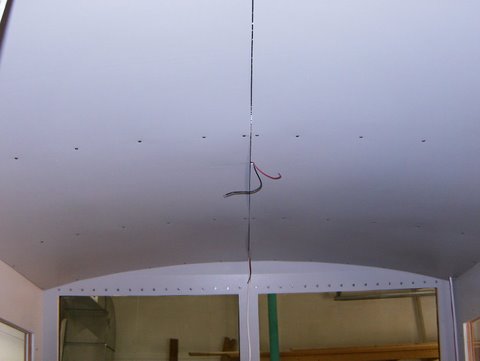 |
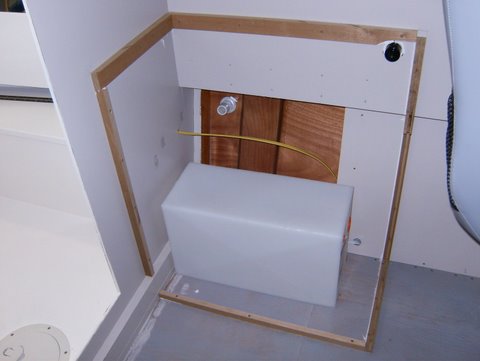 |
The sink location
(which is built) and water tank, but plumbing must take place as well as shelving before the cabinet is set into place |
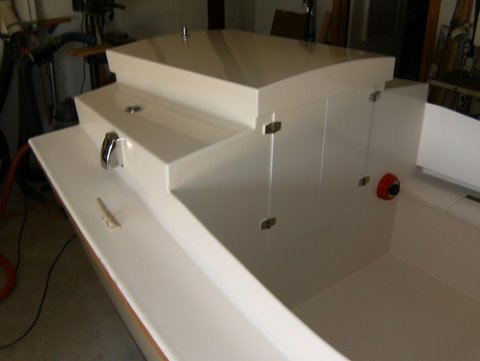
| The
finished engine compartment with part of the cockpit showing. Note engine/fuel tank vents, fuel fill, battery selector switch, etc. |
 |
 |
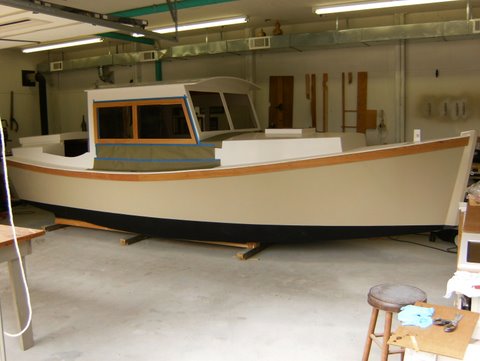
This is the latest
picture of the outside. Most everything is finished on the outside except hanging the pilot house doors and painting a black strip at the top edge of the oak board running the length of the boat. |
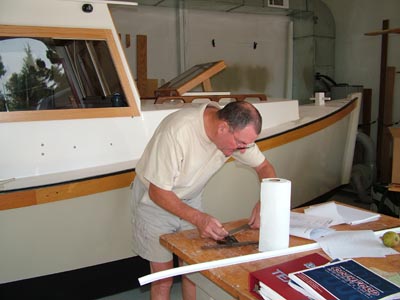
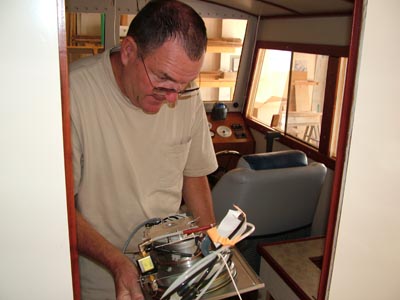
September 13 - We took off for our "vacation" to impose on some more friends and family for the next week and a half. First stop was Pat and Paul's house where the first thing to do was to check on his progress on the Redwing 23 he is building. I'm really happy that I was able to stop by at this point because I could see the boat just before it is really finished. I expect that by the time I return in two weeks to teach Paul to use my sewing machine and help him sew some bug screens for all of the openings, the boat will have considerably more finish work completed. To the right is a picture of Paul working on a piece for the small burner/heater that was the project of the day to be installed. Lower left you can see the top cutout for the burner and to the lower right is the burner that is upside down getting ready to be fitted. This unit is run off of mineral spirits and runs on high for about a cup an hour of fuel. On top of cooking, the unit can also be used as a heater during the cold portions of the fall and spring. Overall a very nice system and it has a power vent to the outside for waste gases. |
 |
  |
|
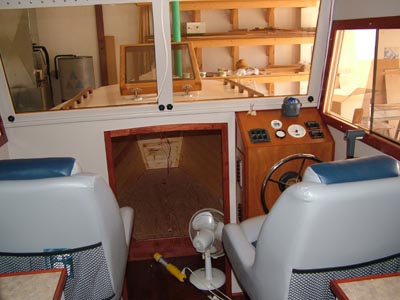 |
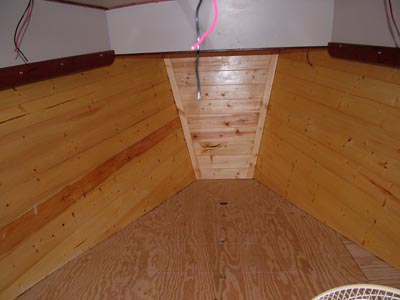
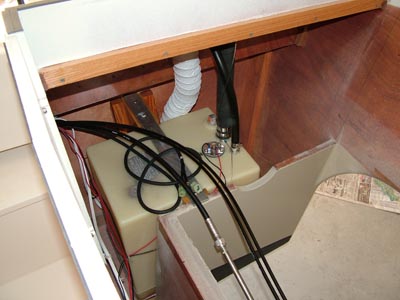
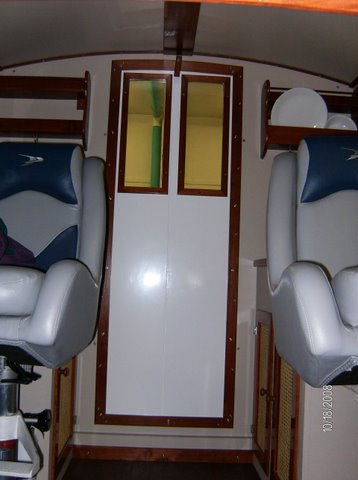
The picture to the left is the cockpit area with their two seats installed and the helm station. You can see out the front windows and see part of the side window that slides. Those are some of the windows we will be making screens for. Lower left is a picture of the V berth which is awaiting the foam padding, lights and fan. He built a cute little dresser in the corner too. Lower right is a picture of the fuel tank in the engine compartment. There are just so many details to take care of when you build anything and a boat is no different. |
 |
 |
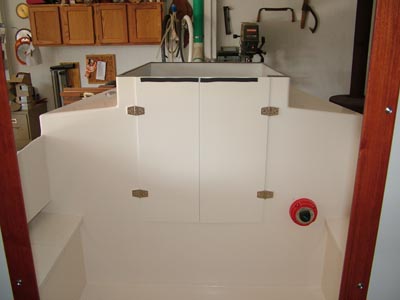 |
This is the view of the cockpit area and engine compartment from inside. I didn't have the engine top on when we took the picture which really gives it a finished look. Next time. |
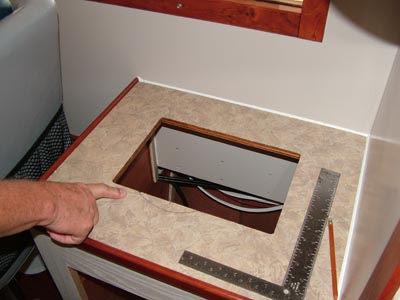
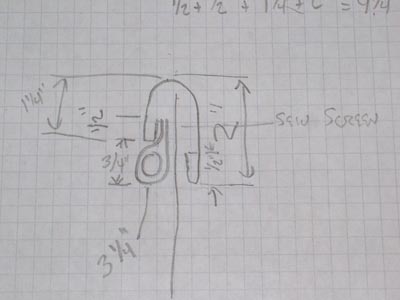
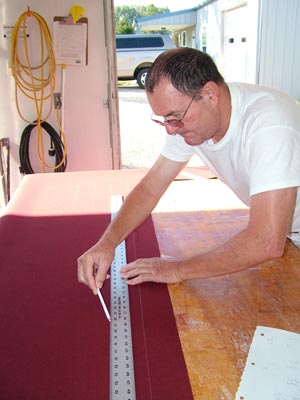
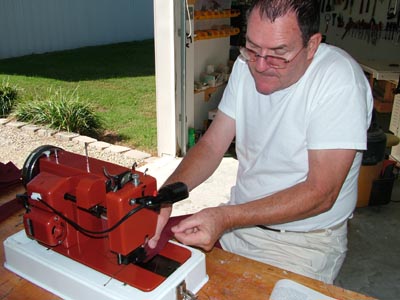
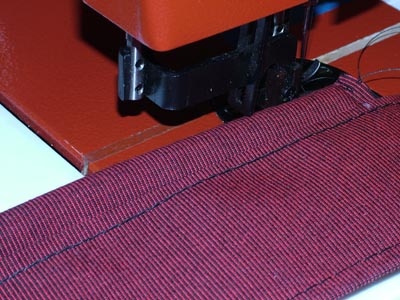
Oct 2 - This is written from Jim's perspective because Paul came over to pick me up so I could take my sewing machine to his house, teach him to sew, and sew some bug screens for the Redwing 23.. We planned the screens for his boat and decided to start early on Paul's sewing education. To plan this out, I drew up the plan to the right. It involves sewing a 1/2 inch cording and then attaching the cording to more material so it can be turned and the screen will be sewn in the middle. Bottom you see Paul starting to layout the cuts and to the right he is learning to set up the sewing machine. |
 |
 |
 |
 |
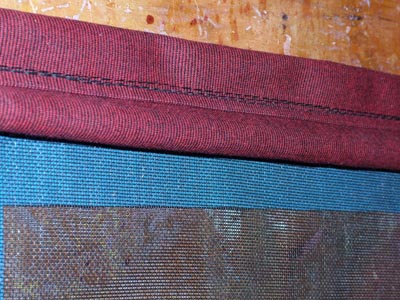
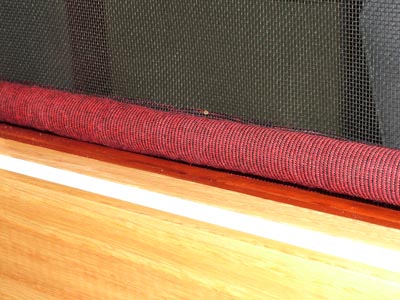
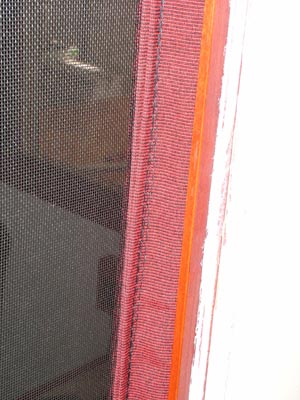
This picture shows the cording attached to a second piece of material which will be wrapped around the bug screen. You can see the first piece sewn to the screen lower left. Why the blue tape? The blue tape was my idea to give us a way to sew the material exactly where we wanted it on the screen. We first taped the screen to the window then we used the blue tape to establish the edges of the window. Next we measured in from the edge of the window and established the sew line. The amount we measured in was to allow the cording to lay on top of the window trim. You might be wondering why the cording. That idea came about because most bug screens allow bugs to get in. I've not seen too many bugs go around tight corners so that is what we came up with. The picture you are looking at on the lower right is with the first screen installed and it is taken from outside Paul's boat. You can see the cording wrapped in material laying on top of the trim. This is on the outer portion of the boat and you can see the bug screen going upwards. |
 |
 |
| The picture to the right shows the screen installed and the material that is used for snapping it to the window frame. | 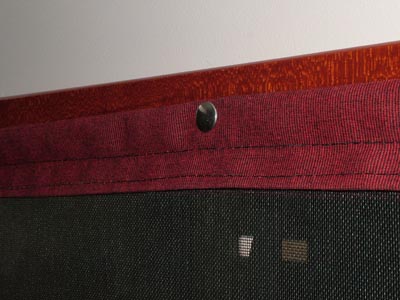 |
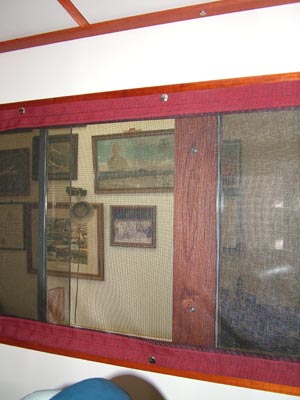 |
The picture to the left shows a fairly large portion of the screen installed to the window. Overall, the result was very good. We are both sure it will keep bugs out but it was labor intensive to complete. The other issue with these screens is they won't roll up and become compact. We figured he will store them under the mattress of the bed. |
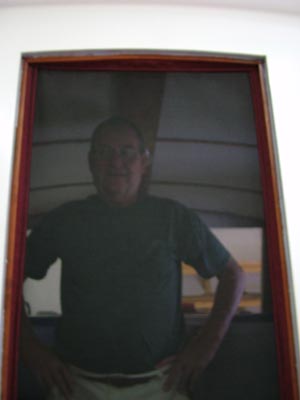
Now for the door screen. After we quit work on Tuesday evening, I took some material along with some cording in to play with. I wanted another way to sew cording in so, I folded and played until I came up with another way to wrap the cording without using two pieces of material. On top of that, I needed the cording to lay on top of the trim instead of come outside the door. This project came off very good too. Below, you can see Paul inside the boat looking out through the screen and to the lower right you can see him outside the boat looking at the gap seals made up by the cording. |
 |
 |
 |
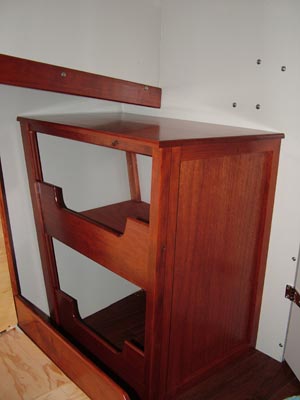 |
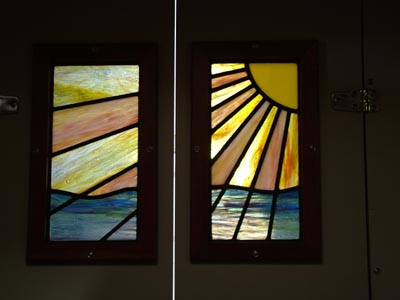
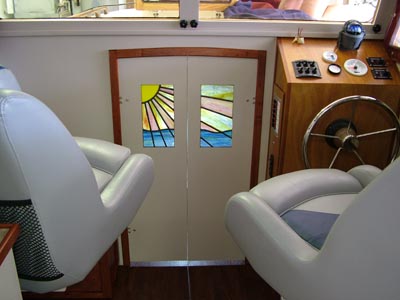
Next I took some pictures of the cabinet he made inside their berth which is forward of the steering station. If you look below left you can see a picture of the stained glass Paul made while he was in Florida last year. I took this picture laying down in the space that will be their berth. As you can tell lower right, the stained glass windows were installed in the doors leading to the berth. In addition, you can see the helm station along with the chair for Pat to use as they explore all the rivers and lakes in their future. |
 |
 |
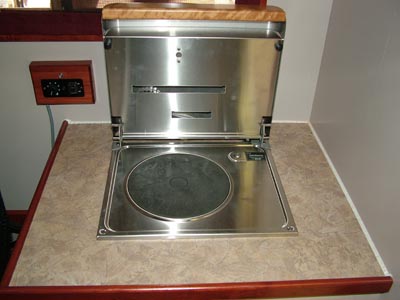
Behind Paul's chair is the one burner stove that also serves as a cabin heater. |
 |
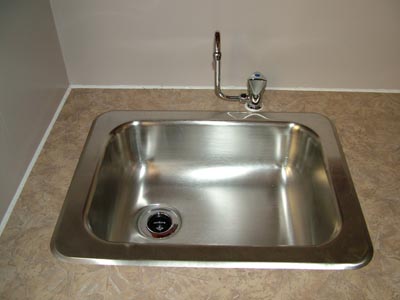 |
This is behind Pat's chair and this is the galley sink. We were able to get out of Puxico by 2 p.m. and arrived back at Kentucky Lake surprising Deb at about 5 pm. (We had to make two stops so I could pick some things up.) Paul took off quickly so he could get back home before it got really dark and we both had a good time. By the way, on Wednesday morning, Paul built me a box with a Plexiglas front cover to use in our head. (bathroom for the non sailing readers) This will go above the water heater I changed out but I'll show you those pictures in a week after I get it installed. Also, we aren't sure what our future holds but we are hoping the people in Washington D.C. pass something. I also hope they figure out that they are the ones responsible for this mess, stop blaming others, and get this thing fixed for the long term. Why does the average person have to be the person paying because lawmakers want Pork in bills, won't balance the budget and don't keep their eye on the ball? |
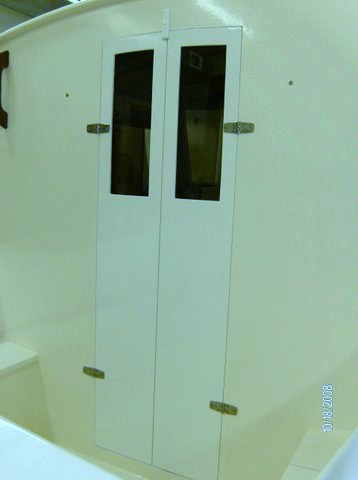
February 2009 update - Paul actually sent me these pictures at the end of October and I forgot to update them. Sorry. Right now he is in south Florida but before he left for the winter, he was able to get his trailer manufactured and a building put up to store the boat in. Now it is only a short amount of time before he gets back and finishes the boat. I'm sure he is looking forward to "splashing it." The pilot house
doors are in! Pictures from the outside with doors One other thing you can just see are the cane cabinet fronts through the rear doors of the boat. |
 |
 |
 |
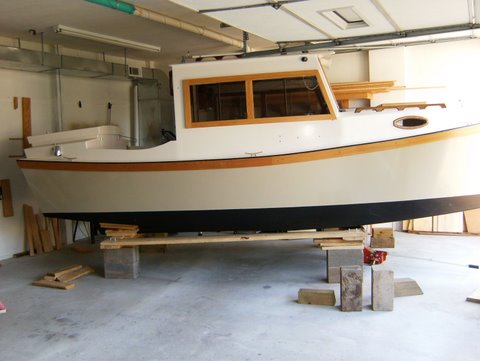
May 14, 2009 - Paul sent these pictures in for his page. He's been busy again since returning from Florida this winter. It was time to get the boat off the floor and onto the trailer so he could mount the engine and do all finishing touches before launch. The picture to the
right is the boat lifed with jacks while still on dolly. |
 |
 |
 |
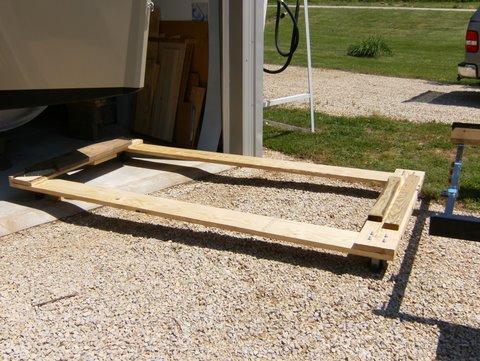 |
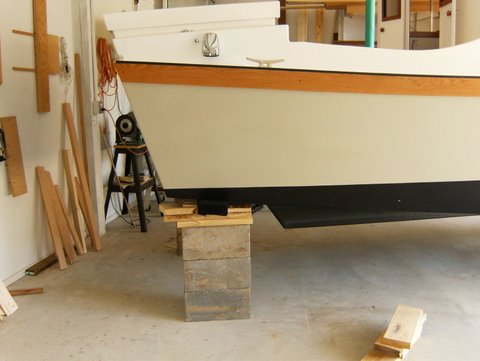
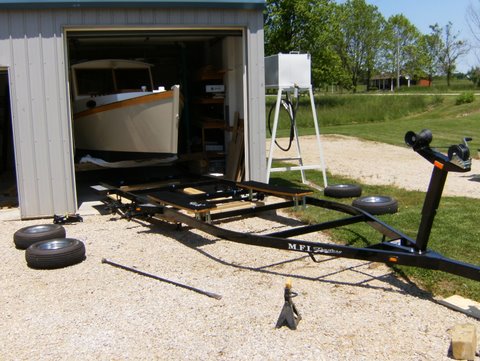
The dolly was then
cut and made more narrow so it could support the trailer frame and role
back underneath the boat. Lower left shows the trailer on the modified dolly, ready to slide underneath block supported boat. Note the fenders and wheels had to be removed. Below left shows the boat now on trailer, ready to leave the shop. |
 |
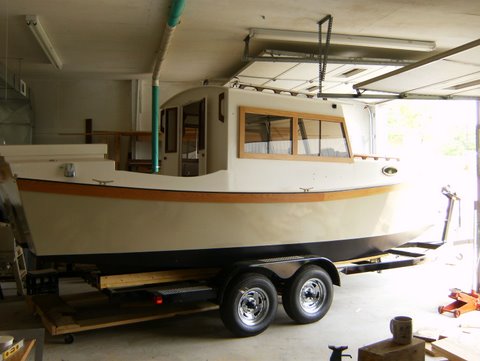 |
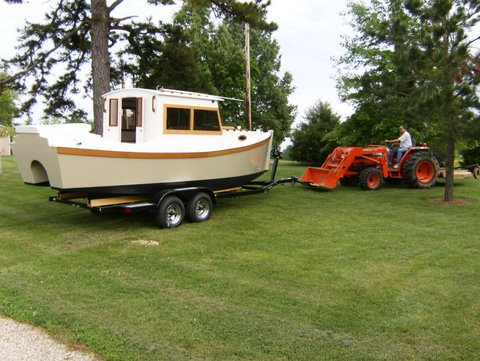
| m/v Mattie
Mae leaving the shop, May 12, 2009 |
 |
 |
And being put into
her new home when she's not in the water Things are really getting interesting now. |
| May 17, 2009 - The engine is now mounted. Can't you just hear the Varroom Varroom sounds? | 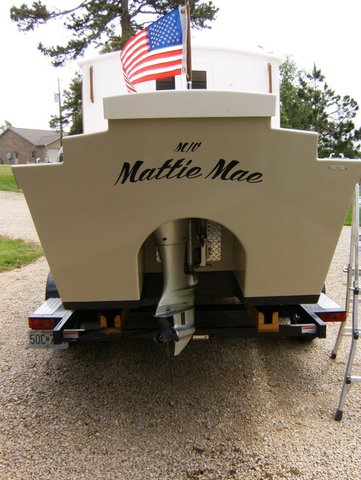 |
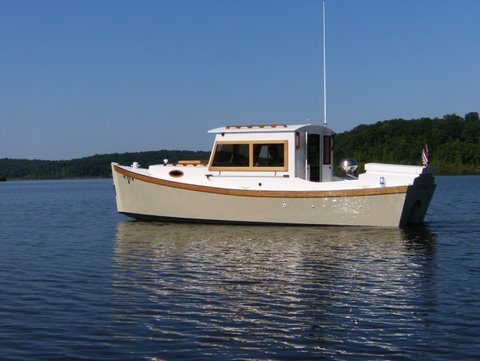 |
Nov 14, 2009 - The boat has been finished since late spring and was launched. It performed very nicely and has seen a number of lakes over this summer. After proving out all the systems and taking care of small issues, it is ready for some cruising in Florida this winter. |
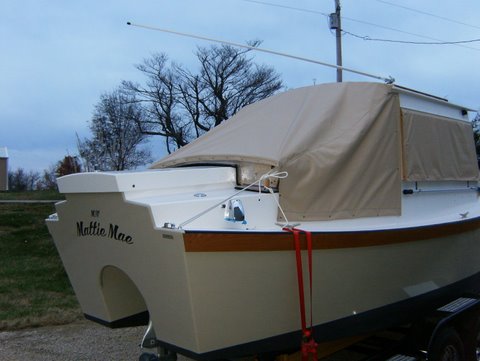
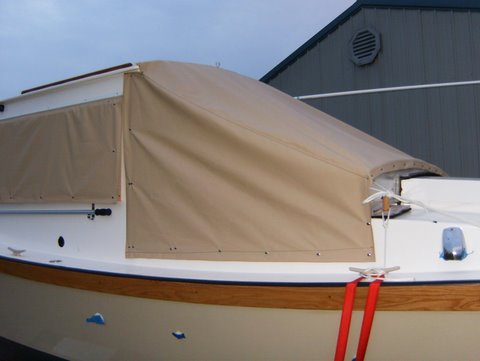
The only issue was that where it is going to be stored this winter in Florida, there isn't a covered area for it to sit under. Therefore, the aft area needed a cover so the water didn't get into the boat. After thinking about it, the decision was made to make a small piece that fit on top of the engine compartment with the same shape as the top. This way there aren't complex sewing that needs to be accomplished. You can see in the pictures that canvas was sewn to protect the windows and the cockpit of the boat. One of the advantages of the canvas over the windows is when the boat is in a marina, you can snap on the canvas to provide additional privacy. So the boat has been completed and it works to expectations. Now comes the other fun part - using it. |
 |
 |
 |
Web Page by Jim Faughn